
Happy May Day!
/Last week I had two lovely ladies come and learn how to make hand tied floral bouquets to give to family and friends for May Day. I found this information about the history of May Day from a shop in Utah County called “Heirloom Art Company.”
I love traditional celebrations, and holding on to the good things our ancestors embraced. Sometime in the last century, May Day stopped being a widely celebrated holiday in America. There are pockets around the country that still celebrate in small towns, but it is quickly becoming a forgotten holiday. There's a certain timeless charm associated with May Day, a day that once filled communities with the sights of flower crowns, the sweet sentiment of exchanged 'poesies,' and the communal joy of maypole dances. It's a gentle reminder of a time when the arrival of spring was met with widespread celebration and a deep connection to the natural world.
While the echoes of these vibrant May Day traditions have softened in America over the years, with celebrations now often confined to smaller, dedicated communities, the essence of the holiday and its connection to the season remains. Many countries in the world still celebrate May Day and have their own rich heritage of traditions.
Often celebrated with a sweet delivery on the doorstep, a posy of flowers arranged in a paper cone hanging from the handle of the door from a friend. Posies are often exchanged among friends and lovers to celebrate May Day.
I ordered these galvanized metal cones and covered them with beautifully printed floral paper napkins using Mod Podge.


Once they were dry, I sprayed them with a coat of sealer to help protect them from any rain or moisture that might temporarily get on them.
It seems with many of my projects one thing leads to another. As I thought about hanging these metal cones on someone’s door, I worried about damaging their doors and door hardware. So, I came up with another part of the gift to still deliver to the front door but in a more friendly, less damaging way. I ordered some galvanized flower buckets on Amazon, and had Ronnie help me cut some sticks from dried branches we had in the back yard.
I secured the stick in the bucket using river rocks from the plant nursery and then centered the stick in place using masking tape across the top of the bucket. Once I was satisfied the stick was as straight as possible, I used spray foam from Home Depot over the rocks to secure the stick in place.


This spray foam must be used cautiously as it often has a mind of its own and expands much bigger than anticipated. I’ve used it many times in the past and learned this lesson the hard way. I now use it with great caution erring on the side of not using enough verses using too much. You can always add more after the initial fill has dried. This spray is actually meant to fill gaps and cracks around our homes. I get the 1” expansion foam instead of the 3” expansion foam as the 1” is more controllable. A note of warning, this does not come out of clothing, or off your skin. Whatever it comes in contact with is there for the rest of time. I got it on my hands once, and nothing I tried to use would remove it. I even contacted the company, and they told me it would just have to wear off. I ended up using sandpaper on my hands to get it off. A most painful lesson. Be sure to leave the can in the garage over cardboard or something as the foam continues to come out for days after you are done using it. You can see from the picture, what it does! It’s been over a week since I sprayed from these cans, and the foam art they are creating keeps changing every day. Once it stops, I can throw it all away. Also, once you use the can, it generally can’t be reused. Because of this you will want to have all your projects ready to use the foam at the same time.
Once the foam was dry, I added more rocks on top of the foam as the floral arrangements ended up being heavier than I thought they would be. The extra rocks gave it the stability it needed. I then cut a piece of faux boxwood greenery to cover the rocks and foam inside the bucket.
Ronnie helped me figure out a way to secure a wrought iron hook to the top of the wooden sticks to hang the cone of flowers from.
My ladies came and made four real flower arrangements, and three faux flower arrangements.

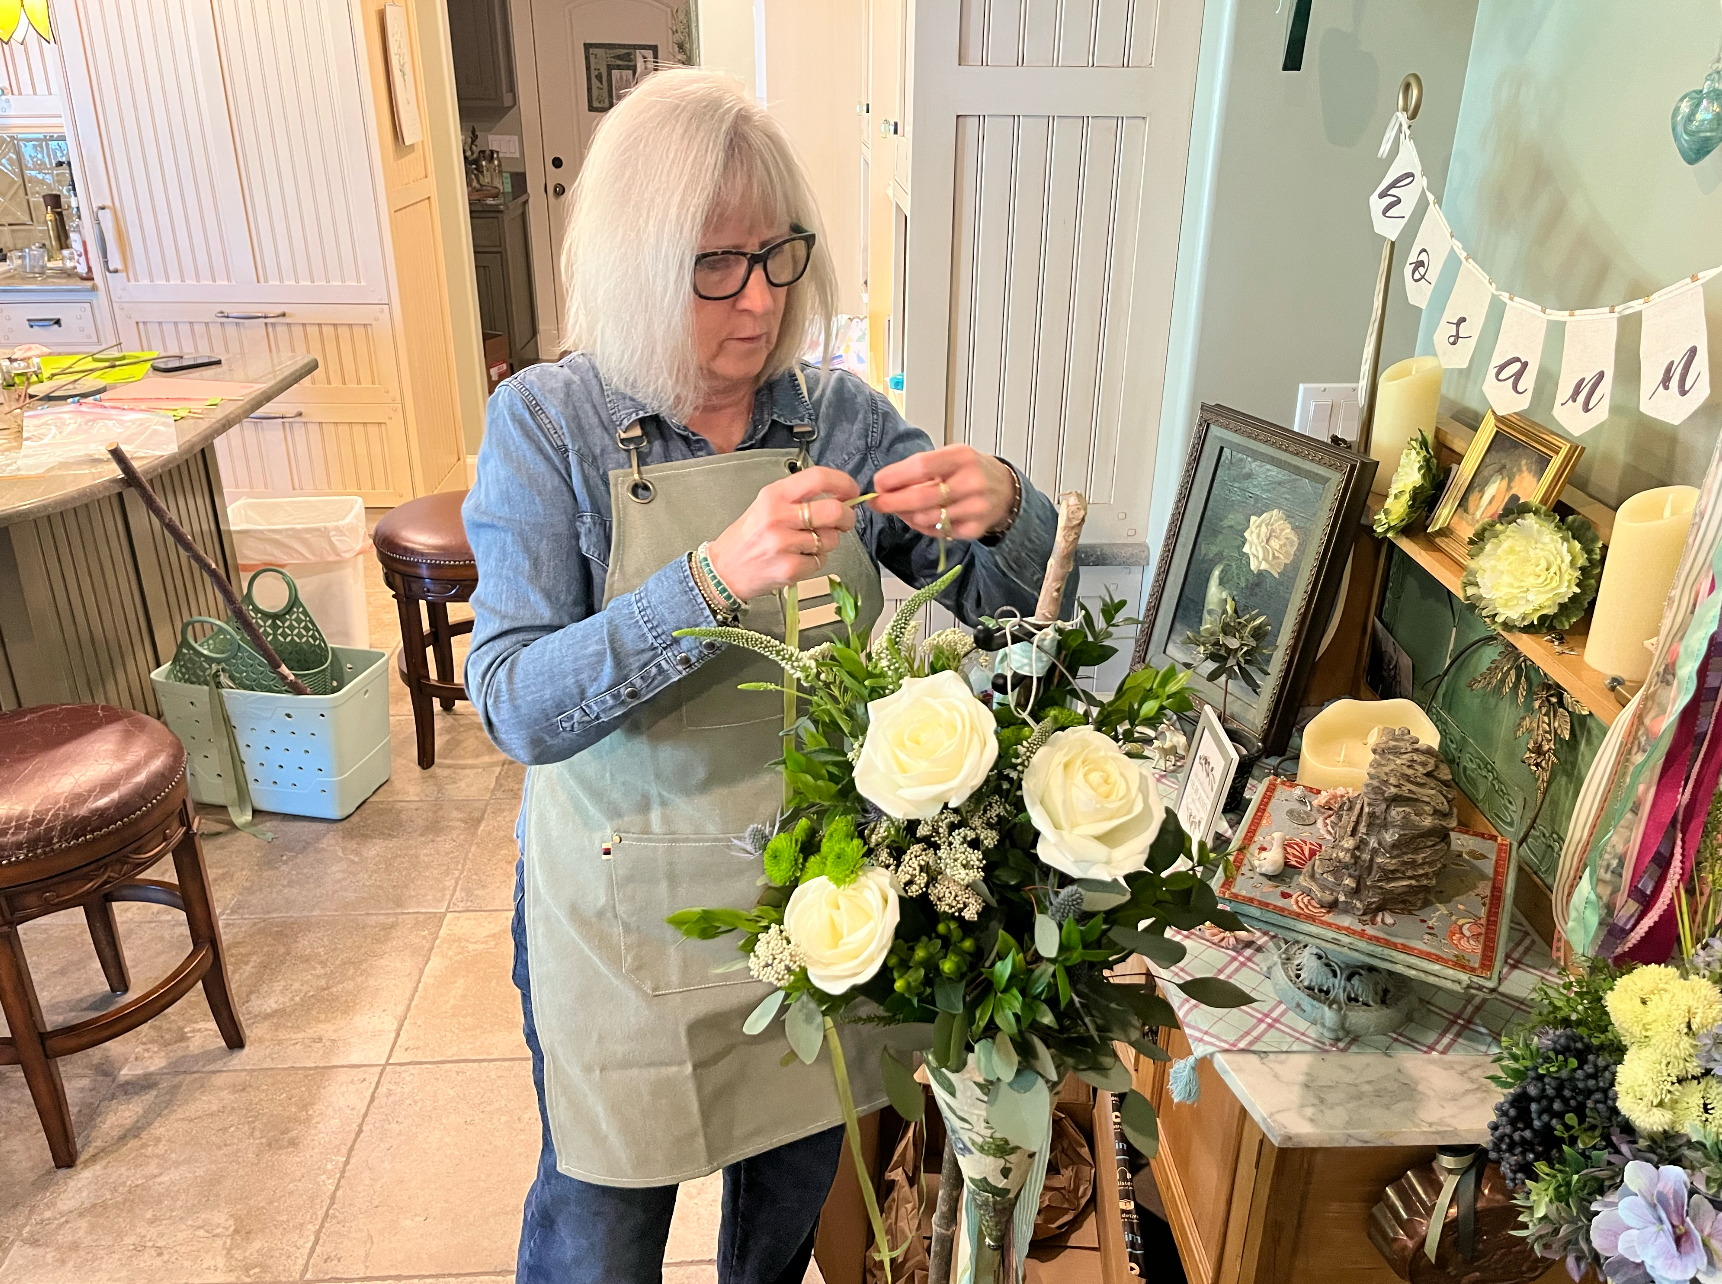


It took the greater part of the day, but in the end, they all turned out beautiful!


We added long ribbon streamers to help hide the hose clamp we used to attach the hook with, a tiny little “Happy May Day” flag that I printed and cut using my Cameo Silhouette, and the finishing touch was the tiny “May Pole” complete with different colored ribbons and a happy wood painted topper with a pearl bead and a tiny flower bead on top of that.
This project had many time consuming steps and was a true labor of love, but hopefully one that can be re-used every year on May 1st as we celebrate the arrival of Spring!


I love teaching others how to create beautiful things to share and give to their family and friends.
It is my hope that sharing what talents I have will bring LIGHT into the lives of those I am blessed to know.
The challenge this week is to find something to welcome Spring into your living spaces whether that is indoors or out.
It can be as easy as planting a flower from the nursery, or making something with flowers to gift to a friend who may be in need of a little LIGHT. And if you don’t have time or energy for any of that, “Trader Joe’s” always has a fun little LIGHT filled section with ready to gift flower arrangements that many times cost less than $5 and come in a cute vase or pot.
Have a great week!
Love Ya, Les 😊