Sometimes Christmas Gets a Little Out of Control
/Do you ever have a project that starts out in your mind as quick, simple and easy . . . and then before you know it, you’ve created a monster and you’re too committed to turn back? Yeah . . . that’s me most of the time. :) And each time I do that to myself, I promise to never do that again. :) That happened to me again this year with my handmade Christmas gifts for neighbors and friends. Last year my daughter called and said, “Mom! Target has these adorable little Christmas trees for $3!!! Do you want any?” As I was just finishing up my latest too committed to turn back Christmas gift project, I said yes!!! Get me 100 of them!!! She said, “Oh my heck mom!!!! Are you serious?!!!” Each year I do personal shopping for 3-4 ladies that place their orders for the next year early. I knew I would be doing them again, and so I had her buy accordingly. In my defense, only 50 of them were for Ron and me.
My goal each year is to get them done early, so that I can enjoy the Christmas season myself. But as the year moved along, my brain couldn’t come up with what to do with these little trees until November!!! Why does it work that way?!!! I’ve had a lot of medical issues this year, and that made things a little more complicated as well, but by November I was feeling much better and not as tired, so I plunged in with both feet!
Steph kept saying, “Mom, just tie a bow on it, add a cute tag and call it good!” But in my Leslie way of thinking, I knew that little tree deserved so much more!!! In the beginning it was just supposed to be the little tree with a strand of battery operated fairy lights, and some sort of star decoration. In the end it turned into all of that in addition to:
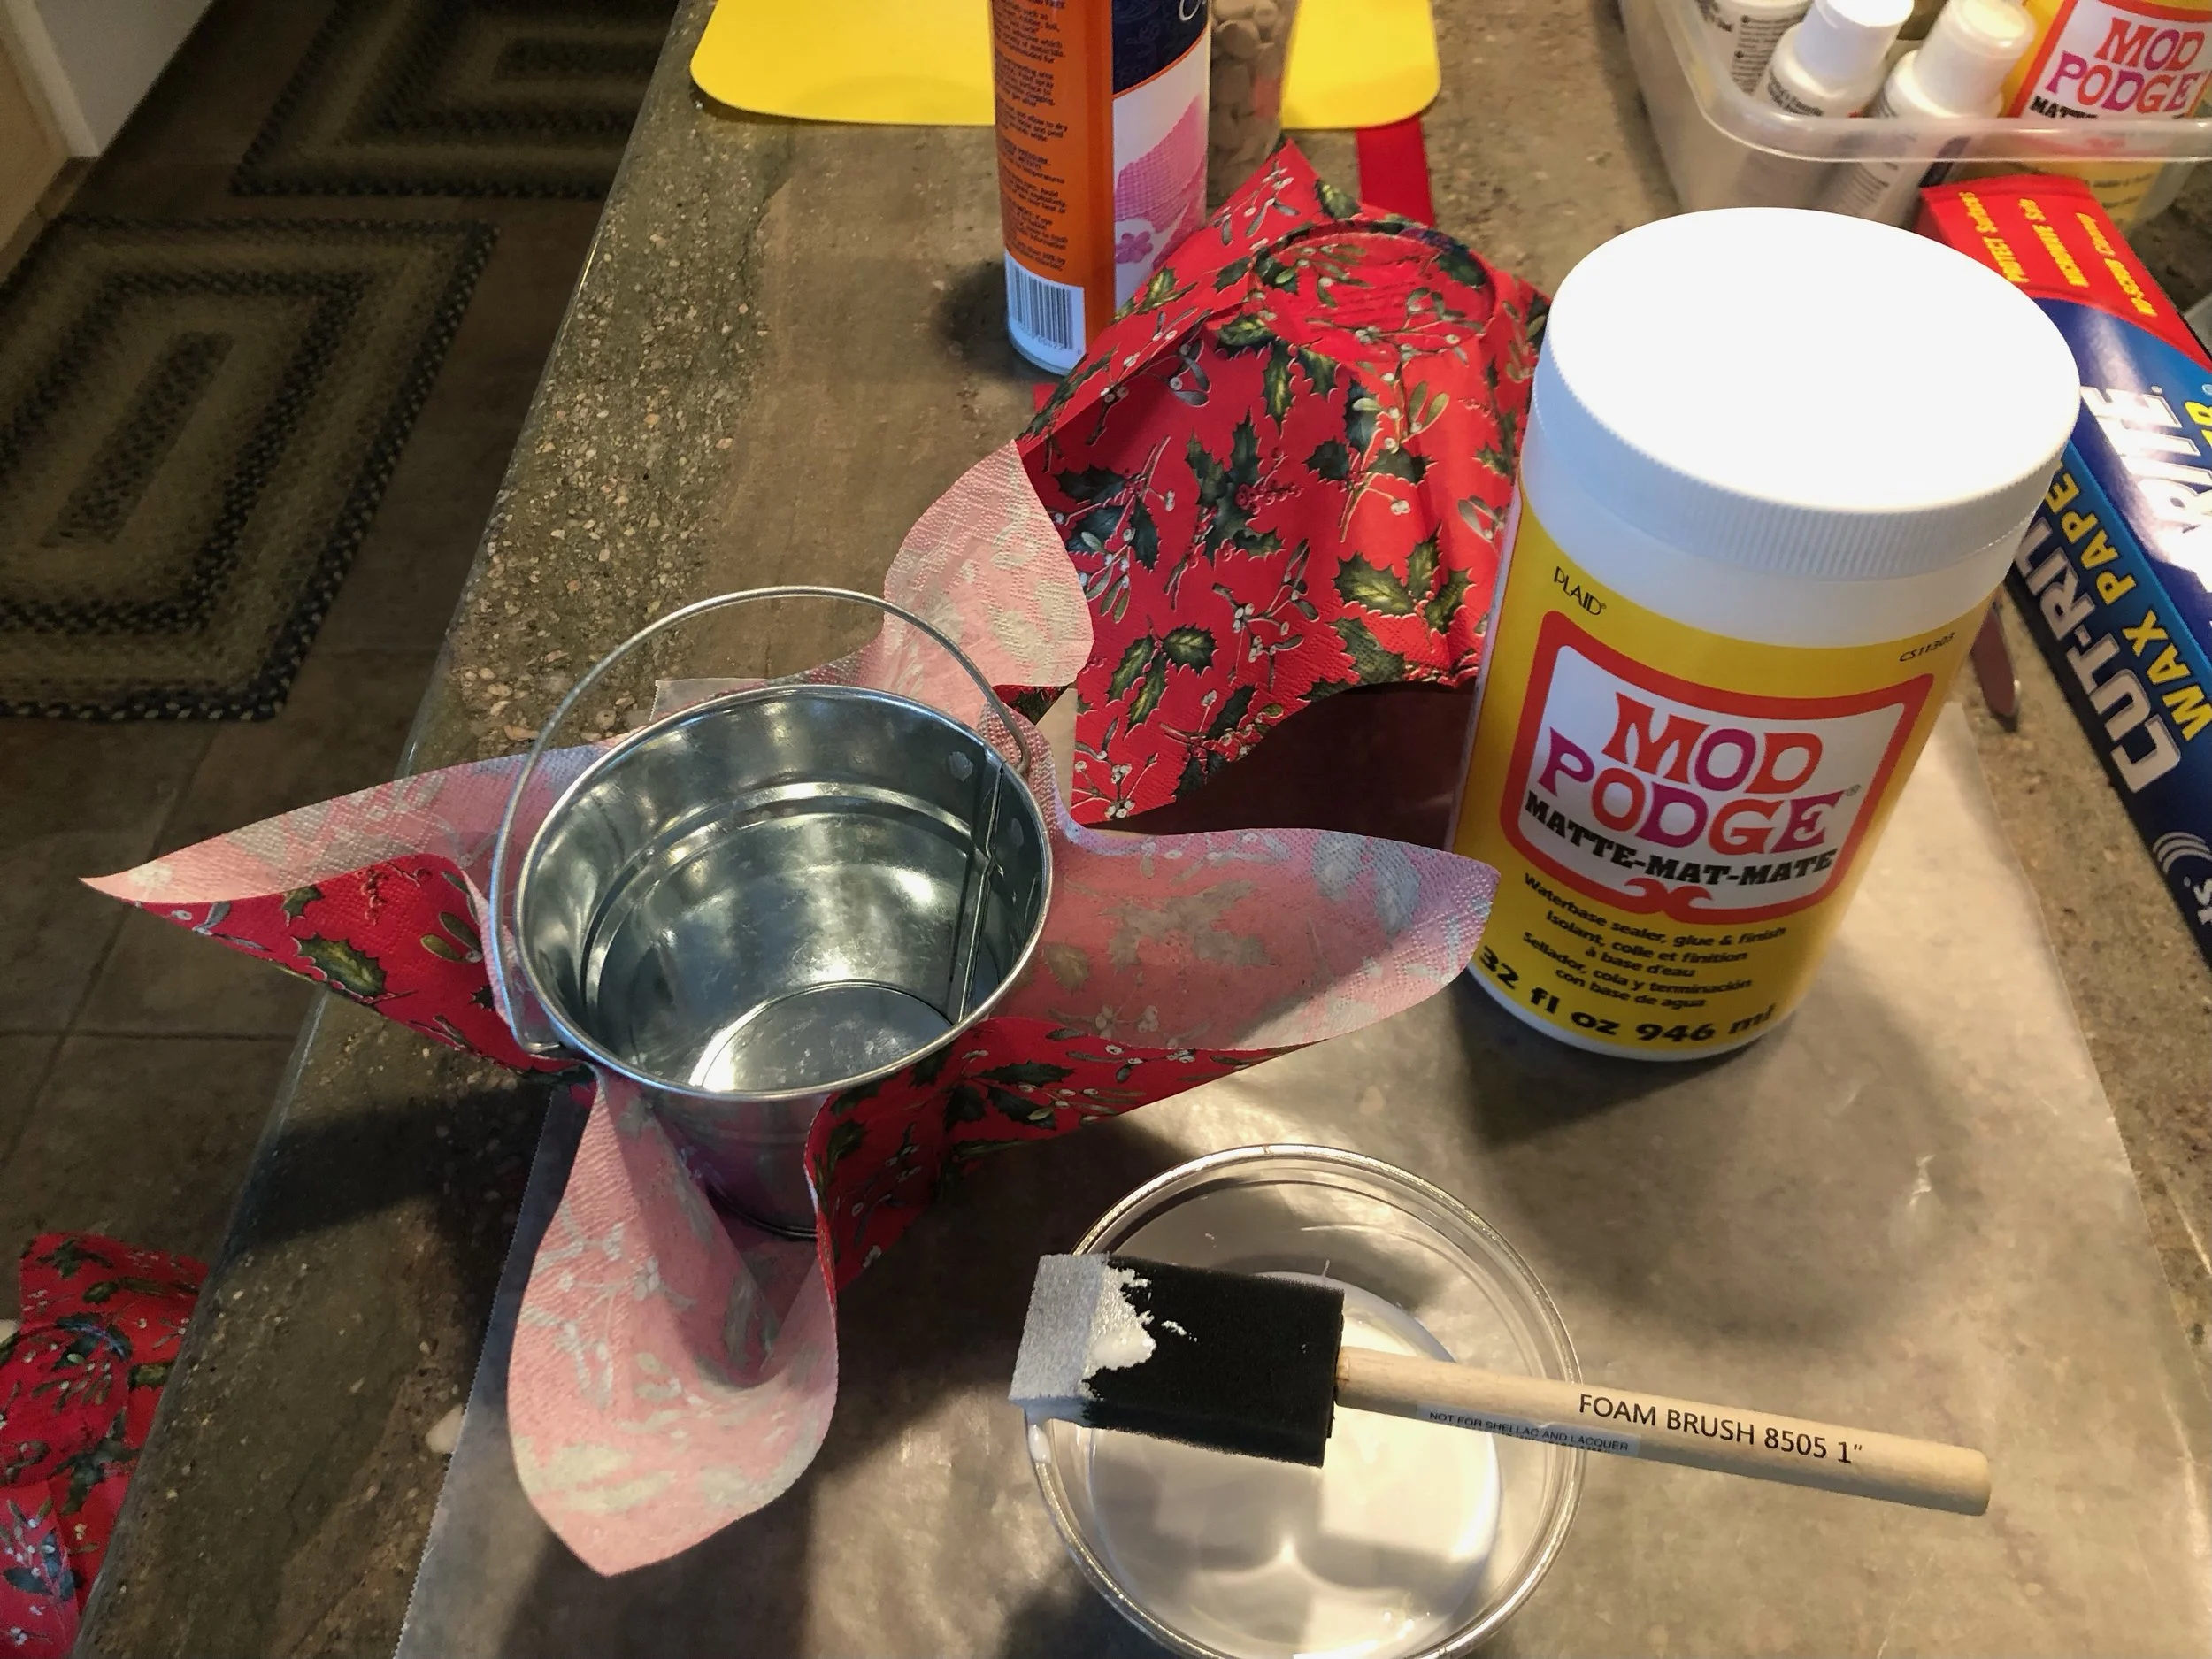
· Cute bucket from Hobby Lobby that was too shiny and so I had to find cute paper napkins, peel the two layers of those apart, and then Mod-Podge the pretty layer onto the bucket. This step took longer than any of the rest, but it was a “hafta-do”. Adding Mod-Podge to a single layer of napkin makes the napkin tear and fall apart easily. This had to be done carefully, which took more time.
I Mod-Podged the bottom of the bucket first and let it totally dry, then flipped it over and did the sides. Then the top had to be trimmed, and another layer of Mod-Podge secured the top edge to the bucket. I love how the Mod-Podge made the color of the napkin a deep rich cranberry color, and the holly leaves are my favorite Christmas greenery.
· Tree had to be fluffed and fairy lights added. I made sure to leave a 2 ½” loop with one light at the end of it, long enough to fit through the hole in the back of the tiny house after it was tied to the tree. If you’re going to make a house, it has to have lights inside right? No matter how hard I tried, I couldn’t get any more length at the end of the strand to get the battery/switch part to hang down behind the back of the cute bucket where it wouldn’t be seen, so it had to become part of the décor. That called for another tag to be made and stuck on with glue dots to hold it in place. Then the battery/switch end of the lights could nestle into the Spanish moss placed on top of the glued-in tree base.
· Plastic cup insert glued with E-6000 into the bottom of the cute bucket filled with pea gravel rocks to give it some added weight in the bottom to keep it from tipping over, and to raise the tree up higher as it sat too far down in the bottom of the cute bucket. But then the tree had to be glued with E-6000 into the cup to keep it from tipping over.
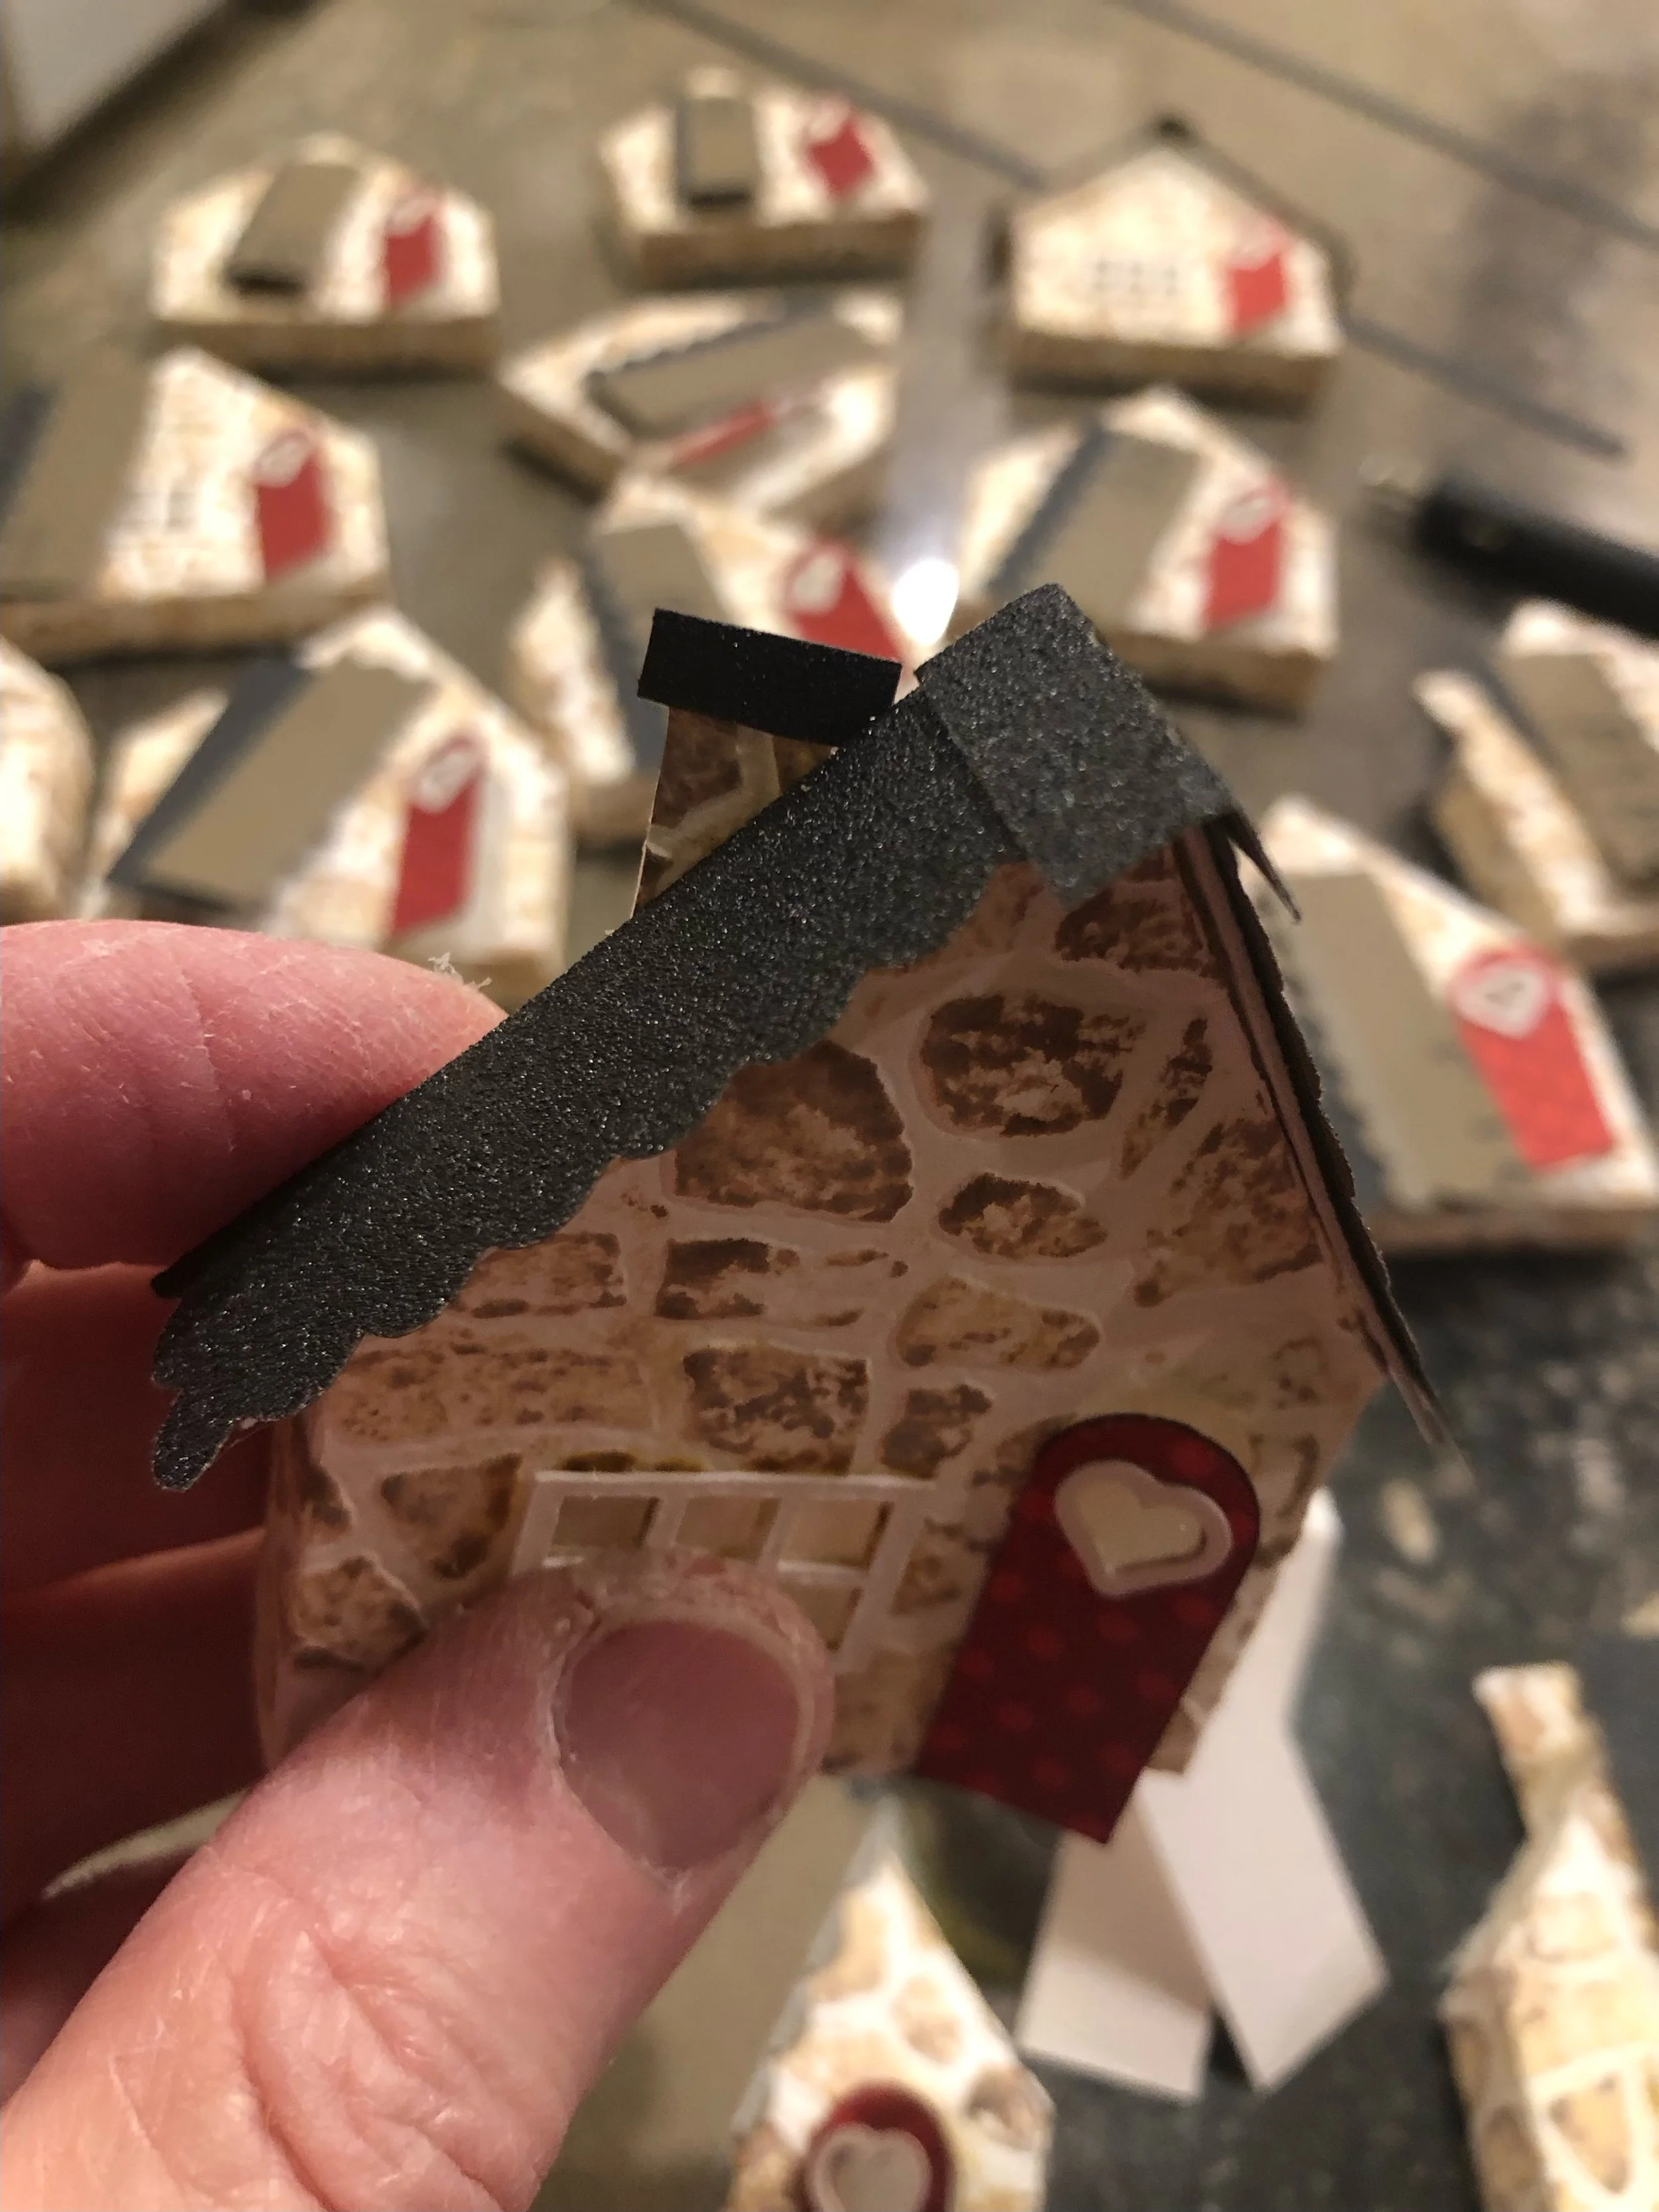
· Tried as hard as I could to resist making a tiny house, as I’ve done those in the past and KNEW how much time they took . . . but in the end the tiny house won out, and that took a full day to design on my Silhouette machine. I knew I didn’t have time to glitter them like I had done in the past, so I cut them out of watercolor paper instead, which took 35 minutes to cut 4 to a page. Times that by 25 to get 100 houses . . . I did however emboss them with a cute stone template by Tim Holtz, ink them with Tim Holtz Distress Ink – first in “Antique Linen”, then a light coat of “Vintage Photo” to add depth and dimension. In order for the embossing not to tear the paper, it had to be spritzed with a light coat of water first. Then glued a small piece of vellum behind the window and door using clear tacky glue – because hot glue doesn’t stick to vellum paper. Used a glue gun to glue the house together instead of my usual clear tacky glue, and that saved a lot of time.
It needed tiny window frames on the house and the heart on the door, glued those on with clear tacky glue. Normally I would have put snow on the roof, but I was simplifying, so chose to use black sand paper instead and cut that with scalloping shears. These are like pinking shears, but have a rounded cut instead of a zig-zag cut. Ron was a trooper as usual and ran to the store many times to get more needed supplies, he even found me thinner sand paper that was easier to cut than the thicker kind I was using at first. I tried to cut it on my Silhouette, but that ruined a blade and a mat, so I went back to my scalloping shears. I like the look of black sandpaper for the roof because it looks like real shingles. After the house was complete, it looked sad . . . not Christmassy at all.
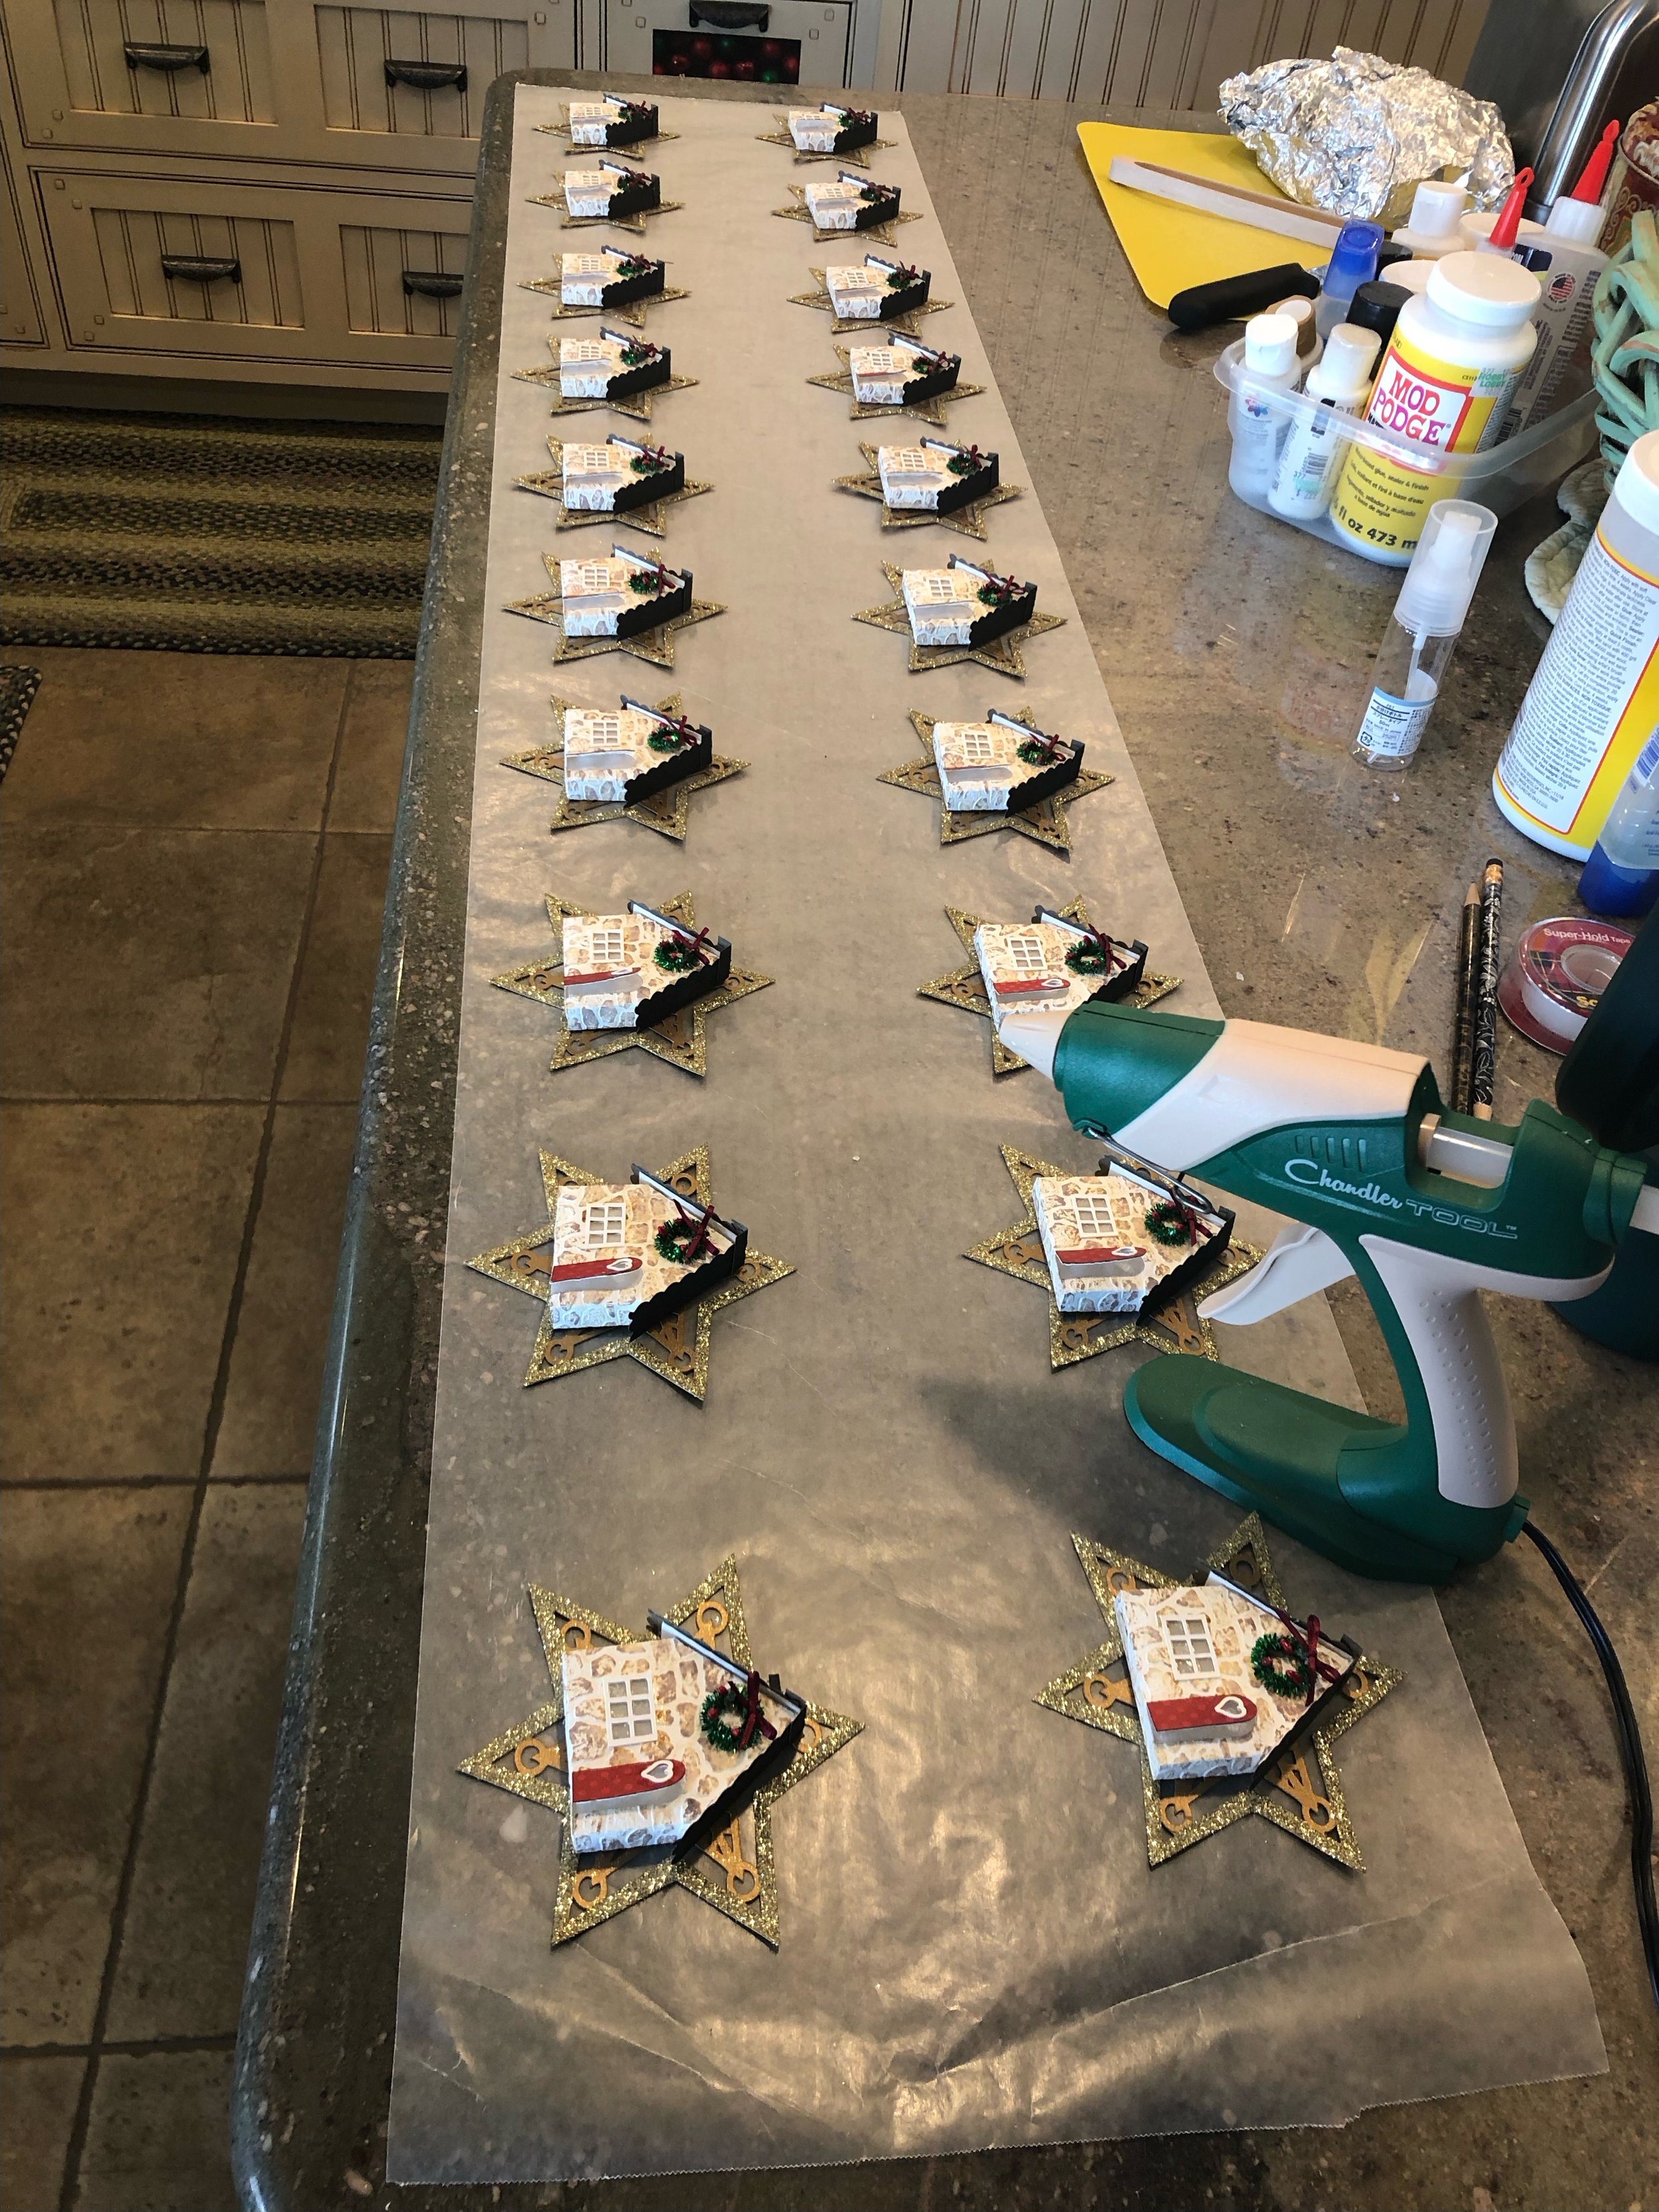
It needed a wreath. I searched and searched on Amazon to find a ½” wreath, but the smallest I could find was 1”. So I decided I had to make my own, but what to make it out of . . .? While I was lying in bed not able to go to sleep as usual, it came to me - just use a green sparkly pipe cleaner! But then it also needed a tiny bow, and even tinier red berries. 1/8” ribbon is so difficult to tie anyway, but when most of your fingers have splits in them the size of the Grand Canyon from the Utah dry winter air and too much crafting, it’s even harder. Pretty sure I keep the “Super-Glue” people in business in the winter time trying to glue the splits in my fingers back together. Wrapping the pipe cleaner around a “Paper Mate Ink Joy” pen made for the perfect size wreath for the tiny house. Glued the ends together with hot glue, glued the tiny bow at the top. Then added three little pip berries with clear tacky glue after the wreath was hot glued to the house. I’ve discovered using tweezers to glue tiny objects in place makes life much easier! Even Ron agreed the wreath was a “hafta-do”. :)
· I had some lovely metal stars from a few years ago I hoped would work, but there was no way to attach the tiny house to them. So back to my Silhouette to cut stars using my favorite matte-metallic antique bronze color cover stock paper from “Paper Source”. Luckily I had a bunch of this left over from a previous Christmas project from a few years ago. It too needed some sparkle, so I only glittered the outside edge, and that was perfect. To do this I brushed on Mod-Podge, then sprinkled it with extra-fine gold glitter, and tapped off the extra. Then set it aside to dry. When it was dry, I hot glued the tiny house to the star, ran a piece of baker’s twine through the hole in the top of the star and tied it to the tree. This is where I carefully ran the single fairy light into the back of the house, and taped it in place with “Scotch Super-Hold Tape”. It’s the shiny kind. The matte kind didn’t stick, I learned that the hard way after I had done 24 trees and discovered the lights were pulling out of the back of the house. This stronger tape did the trick, and the houses looked so happy with their light and wreath!
· The tree needed something else at this point, and I so wanted it to be done! But it needed some type of ribbon or banner above the house. Since my new printer refuses to print on fabric like my old one used to do, I had to design the banner on my Silhouette, print it on fabric transfer paper in a mirror image, and then iron it on to a flour sack dish cloth. Each one had to be hand cut, and then it needed more color! Seriously, this was beginning to be the project that would never be complete!!! So I rummaged through my fabric stash looking for the perfect tiny Christmas plaid. I only had one small piece that would not be enough. While taking a break to go to my new favorite gift store, “Pink & Pine” in Layton Utah, I found the perfect striped ribbon. I brought it home, glued the word banner onto it using “Fabri-Tac” glue, let it dry, and cut them out again. Strung it through the top branches of the tree, and it was perfect . . . almost.
· Because I am addicted to ribbon, it had to have a ribbon sprig somewhere. I tried putting one hanging down from the house/star, but that covered up too much of the tree. So I settled on a little sprig tied happily to the handle of the cute bucket.
· Finished up with the hang tag wishing the recipient a “Happy Christmas” from Ron and me, and I was done!
In the end, my personal shopping ladies chose to go with some other things and didn’t need as many as they had originally said, so I only had to make 70 of these little gems. If anyone wants the items to put together the other 30, let me know, I WILL NOT be making anymore . . . like EVER!!! Ron said, “Next year we’re buying gingerbread men cookies from “World Market”, putting a bow on them and calling it good. Little does he know, I already have most of the things I’ll need for next year’s project – and it REALLY is much simpler!!! :)
My family wonders every year why I do this to myself. When it comes right down to it, creating and crafting things I dream up in the middle of the night brings LIGHT into my heart and soul. I love making things for people, and sharing the talents Heavenly Father has blessed me with. My hope and prayer is that it brings LIGHT into the lives of the recipients! My love language is gifts, to the point of addiction at times. I love showing people around me how much I love them, and the best way I know to do that is to give them the gift of my time and talents that come from HIM. He might say I’m running faster than I have strength, and yes, sometimes that is true. I’ll be working on that as one of my goals for the coming year. I hope you have a wonderful week as we all prepare to receive HIS LIGHT this week, and always.
Love Ya, Les :)


